Sunday, January 29, 2017

DIY Plastic Bottle Charging Station

Hello! Today we're making a charging station for a phone made out of a plastic bottle. You will need:


  • plastic bottle big enough to fit a phone into
  • tape
  • scissors
  • permanent marker
  • paint
  • newspaper or paper bag

First, peel label off the plastic bottle.


Next using your tape, make a straight line across your bottle tall enough for your phone.


Then with your marker, draw an upside-down u shape and connect it to the tape. This will be the holder for the charger.


After that, draw a line above the tape with your marker.


Remove the tape.


With sharp scissors, cut out the drawn outline.


Now, using your charging block, trace it on the holder. Make sure it's centered.


Paint it, and let it dry.


You're done! This is how mine turned out:


This DIY was super easy and quick to make. The longest part is the drying process. It's very practical as well. I hope you try this out!

Until next week,

-Vasti 


Sunday, January 22, 2017

DIY Pom Poms

Hello and happy 100th post! To celebrate, today we're making pom poms. You will need:


  • yarn
  • cardboard
  • scissors
 First, cut a rectangle out of the cardboard and cut a slit through it. Then start wrapping the yarn around the cardboard.
 Once you have wrapped it enough times to make it as fluffy as you like, tie it tightly and take it off the cardboard.
 Cut the loops on both sides.
 Then, spread out the ends of the pom pom to make a fuller look.


 Cut off the long ends and make them even all around. After that, you're done! This is how mine look like:
This DIY was super easy to make. I like how you can change the look just by changing the thickness of the yarn. These are great for other DIYs, gifts, or even attach to a string and make a bookmark! I hope you try this out sometime. 

Until next week,
-Vasti

Sunday, January 15, 2017

DIY Mail Holder

Hello! Today we're making DIY holders to store your mail. You will need:

  • cereal box
  • scissors
  • ruler
  • spray glue
  • scrapbook paper

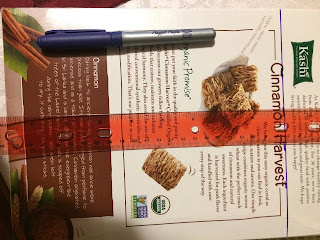
First, cut your cereal box to make it 9 inches tall.


 Then, draw 2-inch diagonal lines from the top corners of the box. Make sure that the space between the lines is about 6 inches.


Once you have connected the 6-inch line to the 2-inch diagonal lines, cut it out.


Do this to both sides of the box, and it should look like this:


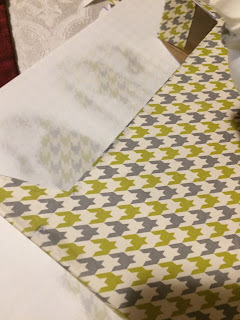
Now that you have the basic structure of the mail holder, it's time to decorate it. Spray some glue on the box.


Cover it with scrapbook paper.


Let everything dry and make sure the edges look clean.


And you're done! This is how mine turned out:


This DIY was super easy to make. It's very practical and great for organization. I like how different you can make it look by just changing the pattern of paper you use. I hope you try this out!

Until next week,

-Vasti

Sunday, January 8, 2017

DIY Broken Glass Candy

Hello! Today we're making DIY candy that looks like shattered glass. You will need:


  • 1/3 cup of light corn syrup
  • 1 cup of sugar
  • 1/3 cup of water
  • Parchment paper
  • Baking sheet or casserole dish
  • cooking spray or butter 
  • Spatula
  • Saucepan
  • Candy thermometer
  • Optional: food coloring
  • Optional: flavoring of your choice (I used cinnamon)

First, line your tray or dish with parchment paper and grease with cooking spray or butter.


Next, put your sugar into a saucepan.


Then add your corn syrup, 


and water.


Stir, and turn on the heat to medium high. Keep stirring until mixture boils, and the thermometer reads 300ยบ F.


After that, take the saucepan off the heat and add food coloring if desired.


Now would also be the time to add flavoring if desired.


Pour the mixture into the tray and let it harden.


 Once hardened, cut the candy into shard-like pieces. After that, you're done! This is how mine turned out:


 This DIY was super fun to make. They make great gifts and are good for decorating. They are also nice to eat in their own! I hope you try this out sometime.

Until next week,

-Vasti

Sunday, January 1, 2017

DIY Bubble Art


Hello! Today we're making DIY bubble art. You will need:


  • Paint in the color of your choice
  • Dish soap
  • Water
  • Straw
  • Paper- I used printer paper
  • Bowl


Pour some water into the bowl.

Add some paint to the bowl and stir with the straw.


Add some dish soap and mix.

Then, blow through the straw to make some bubbles.
After that, gently place your piece of paper over the bubbles.


Pick it up and let it dry.

Once dry, you're done! This is how mine turned out:


This DIY was super easy to make. You can do anything with this decorated paper. Wrap gifts, make cards, envelopes, origami, and much more! I hope you try this one out!

Until next week,
-Vasti