Sunday, December 6, 2015

DIY Gift Bags

Hey! Since we're in the holiday season, I thought we would kick it off with DIY gift bags.

You will need:

  • Scissors
  • Glue stick
  • Any piece of paper (wrapping paper, scrapbook paper, newspaper)
  • String or ribbon

 First, fold your piece of paper an inch down from the top.


Then glue it. This will be the top of your bag.


On that same side, fold your paper into thirds, leaving a bit of an overlap. Then glue the edges together.


Then,  on that same side, fold the "bottom" of the paper. This will be the depth of your bag. If you fold more, then the bag will be wider.


Open the folded part, and fold both sides in to look like this:


Fold the corners down, and glue it together.


Fold the bag to look like this. These will be the sides.


Open it back up, and unfold it. Optional: Add string to the sides to make handles. You're done! Here's how mine looks:


This DIY was so easy, and fun!I love that you can make these really quickly as a last-minute bag.  I hope you enjoyed it!

Until next week, 

-Vasti

Sunday, November 29, 2015

DIY French Macarons

Welcome back! Today we're making French macarons, not to be confused with coconut macaroons. You will need:

Macaron shells:

  • 3 egg whites
  • ¼ cup white sugar 
  • 2 cups powdered sugar
  • 1 cup almond flour
  • pinch of salt
  • ¼ tsp cream of tartar 
  • Food coloring
Macaron filling:

  • 3 large egg yolks
  • 1 cup sugar
  • 1 cup (2 sticks) unsalted butter, at room temperature, cut into pieces


  • First, with a sieve, sift your powdered sugar and almonds together in a bowl. Then you will be left with some small pieces of almond that didn't go through the sieve. You can put those aside to eat later, or just throw them out.


    Then in another large bowl, separate your egg whites, add the granulated sugar, salt, and cream or tartar.


    With a hand or stand mixer, mix the ingredients together until stiff peaks form, and you can flip the bowl completely upside down without spilling the mixture.


    Now add the food coloring. You're going to want to add about a shade or two darker than you want the mixture, because macarons tend to lose their color in the baking process.


    After that, fold in the almond sugar mix with a spatula. Be really careful doing this step because it is very easy to mess up the macarons if you over mix or under mix. If you under mix, your macaroons will be lumpy and cracked. If you over mix, they will be flat and won’t have ridges at the bottom. 65-75 turns of your spatula when folding is about the right amount of time, but it also depends on how strong you are!


    Then, put your mixture into a piping bag. I didn't have one, so I put the mixture into a ziplock bag and cut a small hole at the tip. It works just as well as a normal piping bag.


    Get a cookie sheet out, and line it with parchment paper. Pipe out little circles with your piping bag, and make sure they're not too close to each other like mine were. Now would be a great time to preheat your oven to 300° F.


    After piping, tap your baking sheet a few times against a hard surface to get all the air bubbles out and prevent them from cracking. Leave them there for at least 30 minutes, or until you can touch the surface and it won't stick to your fingertips. Once your oven is preheated, stick them in the oven for 20 minutes. Make sure you don't under bake, or they will stick to the tray.


    While the macarons were baking, I made my filling. There are many types of filling you can put in your macarons, but I made a basic vanilla buttercream. I used this recipe:

    http://www.marthastewart.com/314898/macaroon-filling


    When the macarons are done baking, take them out of the oven and let them cool off. When they're at room temperature, carefully take them off of the baking sheet and and put pipe the filling on to them.


    Finally, you're done! These are how mine turned out:


    Okay guys, to be honest, this DIY wasn't easy. It took trial and failure to make them right, but when I  made them the right way, I felt really accomplished! It takes patience to make them, but all the work paid off. Overall, these were pretty fun to make, and taste great too! You should really try this one out.

    Until next week,

    -Vasti

    Sunday, November 22, 2015

    DIY Lotion Bars

    Welcome back! Today we're making lotion bars. This is very simple to make and is perfect for the winter.

    You will need:


    • 4 tablespoons coconut oil
    • 2 tablespoons beeswax
    • 1 tablespoon olive oil
    • Essential oil or perfume
    • Silicone molds


    The first thing to do is melt all of the ingredients together in the microwave. Then, put it in the silicone molds, and in the refrigerator for at least 25 minutes. 


    When they're cool, pop them out of the molds, and there you have it! Your own lotion bars. Here's how one of mine looks:


    This DIY is so simple, yet really useful. It's really moisturizing, and a fun project overall! You should try it out sometime.

    Until next week,

    -Vasti

    Sunday, November 15, 2015

    DIY Drawstring Bag

    Hey! Today we're making DIY drawstring bags. You will need:

    • 2 15" x 15" pieces of fabric
    • 2 15" x 5" pieces of fabric
    • Sewing machine
    • 4 yards of cording or yarn, but I strongly recommend cording as yarn won't hold very much weight
    • Scissors 
    • Ruler
    • Pins
    • Safety Pin

     First, cut your fabric.


     Then, pin the smaller sized fabric onto the bigger sized fabric right-sides together.


    After that, sew your two pieces of fabric together, and repeat for the other 2 pieces of fabric.


    Then, fold the fabric an inch down from the top to create the loops for the drawstring. Do the same for the other piece of fabric.


    Now, tie your cording or yarn to a safety pin and pin all sides of the fabric except the top.


    Feed it through the top loop starting on the right side.


    Then, feed it through the bottom loop, and back up into the first loop so now you have string coming out from both sides.


     Tuck your string inside of the bag and make it stick out the bottom. Then sew along all the edges of your fabric except for the top. This joins your fabric and makes it a bag.


    Lastly, turn the fabric inside out and you're done! This is a bad photo, but this is how mine looks:

     This DIY was so fun to make. I love how you can use different fabrics and it still looks cute! This project is a little time consuming, but it's worth it. Also, if you don't have a sewing machine, you could always hand sew it or use glue. You should definitely give this one a shot!

    Until next week,

    -Vasti

    Sunday, November 8, 2015

    DIY Hand Warmers

    Hello! Today we're making DIY hand warmers. Winter is coming up, so this is the perfect DIY.

    You will need:

    • Rice
    • Felt or any other fabric
    • Embroidery thread
    • Needle
    • Scissors

    First, cut out 2 shapes from the fabric- I did a heart shape.


     Then, sew the shapes together with a needle and thread, but remember to leave a space open to fill with rice.

     After that, fill the pouch with rice, and sew it together.


    And you're done! This is how mine turned out:

    This DIY was super easy and fun to make. It takes about 10 minutes to make. These make perfect gifts for family or friends. You really should try these out!

    Until next week,

    -Vasti

    Sunday, November 1, 2015

    DIY Deodorant

    Hi! Today we're making our own deodorant. This is a natural way to make it, and it's super easy to make! Let's get started:

    You will need:
    • 4 tablespoons of coconut oil
    • 1 teaspoon of baking soda
    • 3 tablespoons of cornstarch
    • 2 tablespoons of wax
    • 15-20 drops of essential oil
    • Container to put deodorant in
     Step 1: Combine coconut oil, essential oil, and wax in a bowl and microwave until melted.

     Step 2: Mix in the rest of the ingredients.

    Step 3: Pour mixture into container.

    Step 4: Put into freezer until hard.


    And you're done! This DIY was so easy and fun to make! I like that you can make any scent you want, and customize it to your own liking. Thanks for reading, and I hope you try this!

    Until next week,

    -Vasti

    Sunday, October 25, 2015

    DIY EOS Lip Balm

    Hello! Today we're making a DIY EOS lip balm refill. You will need:

    • Old lip balms or any lip balm recipe
    • Empty EOS container- there are many YouTube videos you can watch on how to empty them out
    • Toothpick
    • Microwave-safe bowl
    Step 1: Empty your EOS container, take out the grate, and put it on the other side of the container. I forgot to take a picture of this process, but here's one from google:

    Step 2: Melt your old lip balms together in the microwave.


     Step 3: Pour melted lip balms into EOS container.

    Step 4: Put it in the freezer for about 20 minutes, then take it out, and pop it back into place. Then you're done!


    This DIY was so easy and took very little time to make.You should try this one out!

    Until next week,

    -Vasti


    Sunday, October 18, 2015

    DIY Air Freshener

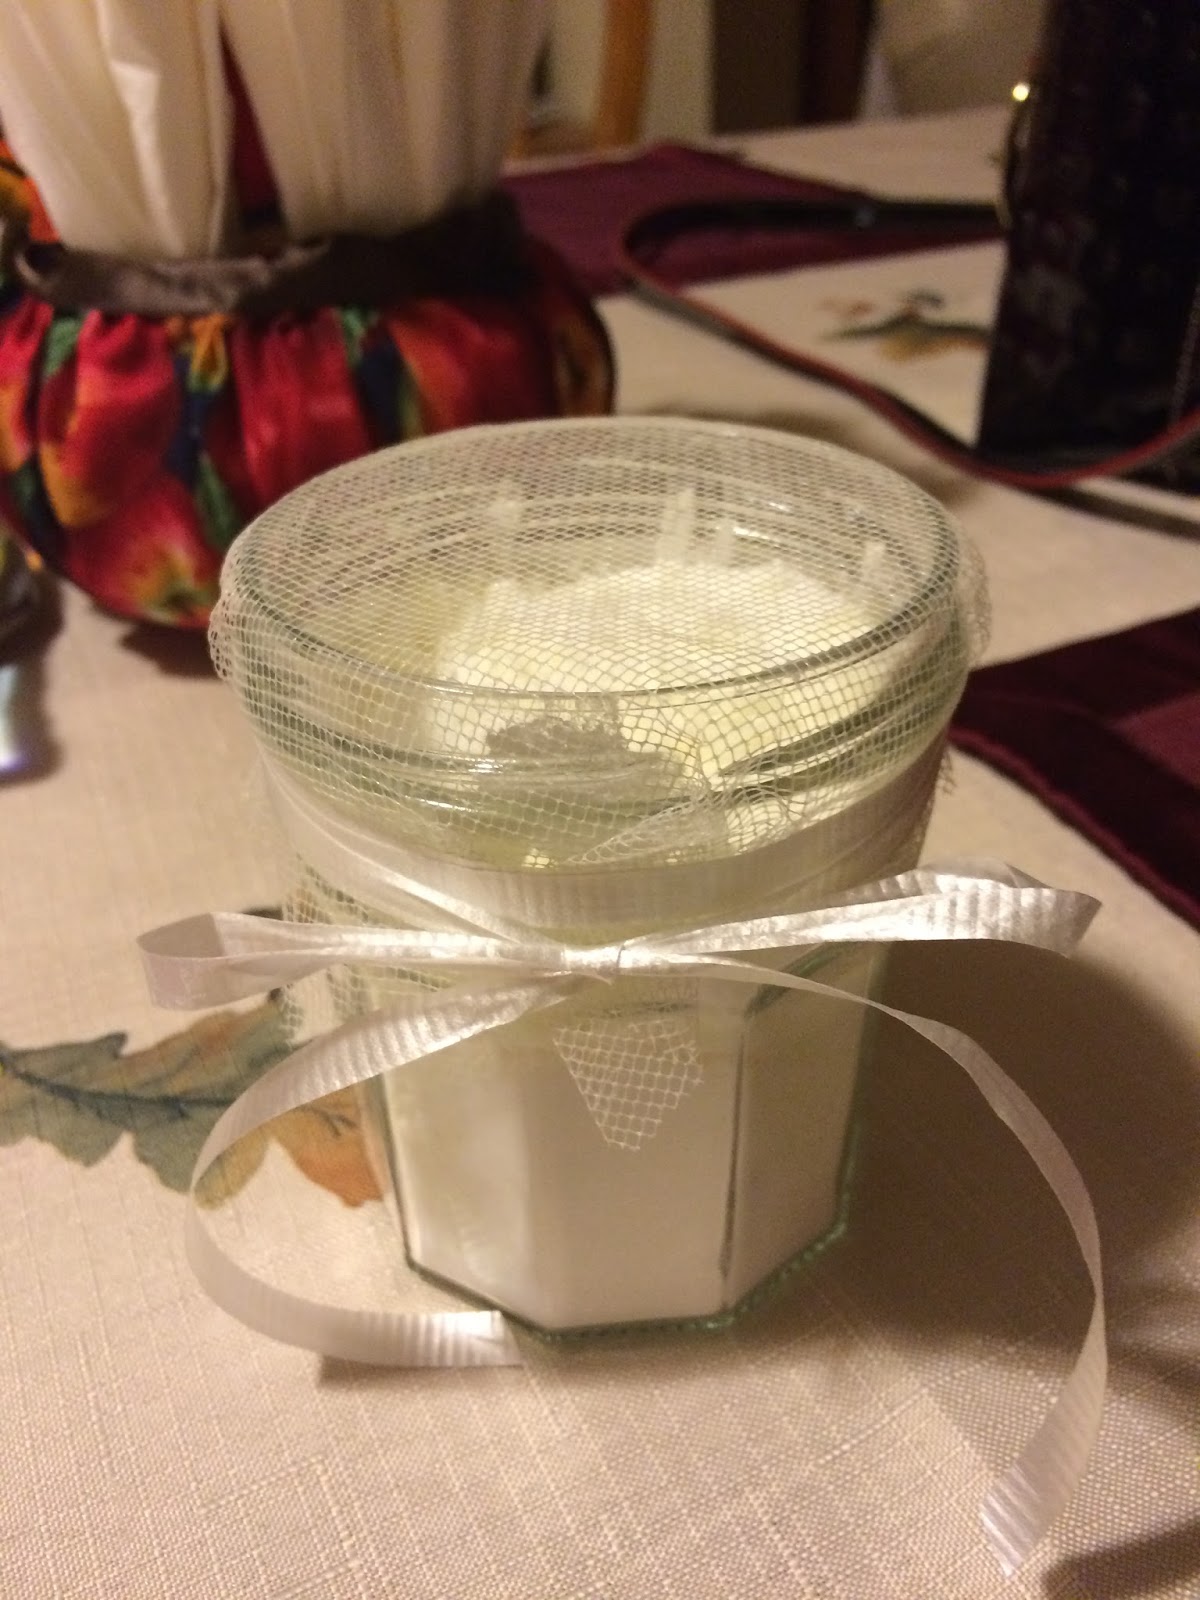
    Hello! Today I'm going to show you how to make your own air fresheners. You will need:

    • Empty container
    • Breathable fabric, such as burlap of tulle
    • Baking soda
    • Essential oils or any kind of fragrance, like perfume
    • Ribbon 
    • Scissors
     

    First, fill your container up with baking soda. Then, add some drops of your fragrance.


     Then cut your fabric a bit bigger than the jar, and place the fabric on top of it. After that, wrap the ribbon or sting around the fabric, making it secure, and you're done!

    This DIY was so easy, and it smells so good! It's great to put in any room, or even locker! It took like 5 minutes to make, and I had all of the materials at home. You should try this one out!

    Until next week,
    -Vasti


    Sunday, October 11, 2015

    DIY Earbuds Holder

    Hi! Today I'll show you how to make an earbud holder. You will need:


    • An empty mint container
    • Scrapbook paper
    • Glue
    • Scissors
    • Pencil

    First, trace your mint container with a pencil.


    Cut it out with some scissors and glue it to the top of the container.


    And you're done! This is how it looks like when it's done:


    This DIY was the easiest thing to make ever. It took like 5 minutes to make, and I had all the stuff at home already. I hope you try this!

    Until next week, 
    -Vasti


    Sunday, October 4, 2015

    DIY Chocolate Bowls

    Hello! Today we're making chocolate bowls. Let's get started.

    You will need:

    • Water balloons
    • Any kind of chocolate
    • Tray or plate lined with waxed paper
    • Spoon to mix
    • Microwave


    The first thing to do is melt your chocolate in 30 second bursts. If you don't, then your chocolate will burn like my dark chocolate did. Then blow up your water balloons, and dip them in the melted chocolate.


    After that, put the balloons on the tray to dry. When they're dry, pop the balloon and there you have it: your very own chocolate bowl!


    This is what it looks like when done:


    This DIY was so easy and fun to make! It's very self explanatory, and takes very little time to make. I hope you try this out!

    Until next week,
    -Vasti