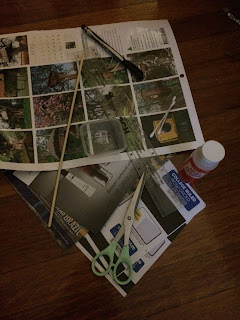
Hello! Today we're making DIY paper beads! You will need:
- Any type of paper
- Scissors
- Ruler
- Mod Podge or white glue
- Pen/pencil
- Wooden skewers
- Paint brush
To prepare the paper for the beads, first measure out 2 centimeters on your paper, pattern-side down. Mark it off with your pen or pencil.
Using a ruler, draw a diagonal line from the 2 centimeter mark to the top left corner of the paper.
Then, from the top left corner mark off 3 centimeters.
Again with your ruler, draw a diagonal line going down this time to align with the other line previously made.
Do this until you run out of paper. I drew x's on the first and last strips because we will not be using them for this project as they are only 2 centimeters long. The lines should look something like this:
Now, cut the paper up into strips.
Now the strips are prepared, it's time to make the beads! Roll the paper strip tightly on the skewer, making sure it stays taught and the sides remain even.
Put mod podge or glue on the end of the paper so it doesn't unravel. I used a cotton swab, but I suggest using a paint brush.
Let the beads dry before taking them off the skewers.
Once they are dry, take them off the skewers, and you're done! These are how my beads turned out:
This DIY was super fun to make. It's a bit time consuming, but it only took about an hour from start to end. I love how different patterns of paper can change the look of the beads! You can use them for anything: jewelry, or other crafts! I really hope you try this DIY out!
Until next week,
-Vasti


No comments:
Post a Comment