Saturday, December 24, 2016

DIY Rice Krispie Treats

Hello! Today we're making DIY rice krispie treats. You will need:


  • 1/4 cup of butter
  • 4 cups of marshmallows
  • 5 cups of crispy rice cereal
  • Saucepan
  • Spatula
  • Tray or casserole dish
  • Oil for greasing the dish

First, melt your butter over low heat in the saucepan.


When the butter is melted, switch the saucepan to medium heat and add the marshmallows.


Once the marshmallows are melted, take the saucepan off the heat and stir in the rice cereal.


Make sure the mix is well incorporated.


Grease your dish with oil to prevent it from sticking.


Before the mixture hardens, transfer it into the dish.


Make sure to pack the mixture down.


Let it harden for an hour, and you're done! This is how mine turned out:


This DIY was super quick and easy to make. They taste great, and are good for any occasion. I hope you try this out sometime!

Until next week,
-Vasti

Sunday, December 18, 2016

DIY Decorated Phone Chargers

Hello! Today we're making DIY decorated phone chargers. You will need:
  • Mod Podge
  • Glitter
  • Phone charger
  • Paint brush or foam brush
  • Tape
  • Scrap paper to protect workspace


First, tape around all of the metal parts of the charger to protect them from the glitter and glue.


Then with a paint brush, brush the Mod Podge on the different parts of the charger.


Then before it is dry, sprinkle the glitter on the charger.


Add another coat of Mod Podge to the charger to seal in the glitter.


Remove the tape, let it dry, and you're done! This is how my charger turned out:


This DIY was super easy to make. It took very little time, and it was fun! Instead of glitter, you could try decorating a charger with washi tape or nail polish. I hope you try this out sometime!

Until next week,
-Vasti

Sunday, December 11, 2016

DIY Tub And Tile Cleaner

Hello! Today we're making DIY bathroom cleaner for tubs and tile. You will need:


  • 2 tablespoons of hydrogen peroxide
  • 1/4 cup of baking soda
  • 1 tablespoon of dish soap
  • Mason jar or other container

First, put your baking soda into the container.


Next, pour in your hydrogen peroxide.


After that, add the dish soap.


Mix everything with a skewer or other utensil.


You're done! This is how mine turned out:


This DIY was very quick and easy to make. It took about 5 minutes, and I like that I had everything I needed at home. You should try this out sometime!

Until next week,
-Vasti


Sunday, December 4, 2016

DIY Mason Jar Advent Calendar

Hello! Today we're making advent calendars using mason jars. You will need:


  • Mason jars (I used 8, but you can use how many you want)
  • Paper (I used old magazines)
  • Scissors
  • Glue (I used spray adhesive)
  • Compass
  • Permanent marker
  • Treats or small toys to put in the mason jars


First, make a circle with a radius of 1.25 inches using your compass. This will be the template for the labels on the mason jars.


Using your template, trace out as many circles as you have jars. I traced 8.


Cut the circles out.


With your permanent marker, write a number on each of the circles starting from 1. I did numbers    1-8.

Then, on a scrap piece of paper, flip the numbered pieces of paper over and put glue on them. If you are using spray adhesive like I did, make sure it is in a well ventilated area.


Flip the pieces of paper over and put them on the mason jar lids.


Now it's time to put treats in the jars! Feel free to put anything you want in the jars. I put in candy, stickers, and small toys.


Close up the jars, and you're done! These are how mine turned out:


This DIY was super easy to make. It's a bit time consuming, but totally worth it! These calendars make great gifts, or just to have for yourself! I hope you try these out sometime!

Until next week,
-Vasti

Sunday, November 27, 2016

DIY Wood Floor Cleaner

Hello! Today we're making DIY floor cleaner. You will need:


  • 1 tablespoon castile soap
  • 1/2 cup vinegar
  • 2 cups warm water
  • 1/4 cup rubbing alcohol
  • Funnel 
  • Spray bottle

First, pour the vinegar into the bottle using your funnel.


Next, pour the castile soap in.


Then, pour the alcohol in.


Finally, pour the warm water in.


Give the bottle a good shake, and you're done! This is how mine turned out:


This DIY was super easy to make. It took about 10 minutes from start to end, and it's a great natural alternative to store-bought floor cleaners. I hope you try this out!

Until next week,
-Vasti

Sunday, November 20, 2016

DIY Paper Beads

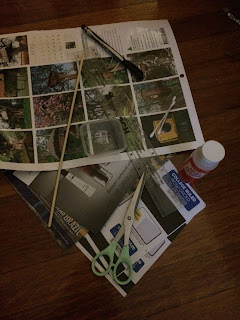
Hello! Today we're making DIY paper beads! You will need:

  • Any type of paper
  • Scissors
  • Ruler
  • Mod Podge or white glue
  • Pen/pencil
  • Wooden skewers
  • Paint brush


 To prepare the paper for the beads, first measure out 2 centimeters on your paper, pattern-side down. Mark it off with your pen or pencil.


Using a ruler, draw a diagonal line from the 2 centimeter mark to the top left corner of the paper.


Then, from the top left corner mark off 3 centimeters.


Again with your ruler, draw a diagonal line going down this time to align with the other line previously made.


Do this until you run out of paper. I drew x's on the first and last strips because we will not be using them for this project as they are only 2 centimeters long. The lines should look something like this:


Now, cut the paper up into strips.


Now the strips are prepared, it's time to make the beads! Roll the paper strip tightly on the skewer, making sure it stays taught and the sides remain even.


Put mod podge or glue on the end of the paper so it doesn't unravel. I used a cotton swab, but I suggest using a paint brush.


Let the beads dry before taking them off the skewers.


Once they are dry, take them off the skewers, and you're done! These are how my beads turned out:


This DIY was super fun to make. It's a bit time consuming, but it only took about an hour from start to end. I love how different patterns of paper can change the look of the beads! You can use them for anything: jewelry, or other crafts! I really hope you try this DIY out!

Until next week,
-Vasti

Sunday, November 13, 2016

DIY Window Cleaner

Hello! Today we're making DIY window cleaner. You will need:


  • 1/2 cup white vinegar
  • 1/2 cup water
  • 2 tablespoons lemon juice
  • Spray bottle
  • Funnel
  • Small bowl
  • Whisk

First, pour the water and vinegar into a small bowl and mix it with a whisk.


Then, add the lemon juice.


With your funnel, pour the mixture into a spray bottle.


And you're done! This is how mine turned out:


This DIY was very easy to make. It's a natural alternative to the harsh chemicals that are in store-bought window cleaners. I hope you try this one out! 

Until next week,
-Vasti