Saturday, May 30, 2015

DIY Hair Bows

Hi! Today I will show you how to make your own hair bows. Let's get started.

You will need:

  • Felt or fabric
  • Glue Gun
  • Hair Clips
  • Scissors


The first thing I did was cut a piece of felt into a square. Then I cut a strip of the felt for the center of the bow.


Then, I folded 2 of the edges in, and glued the with a hot glue gun.


After that, I folded the other 2 edges to the center of the square.


Next, I pinched the long edges of the rectangle to make a bow shape, and glued it in the middle.


When the glue was dry, I took the little strip that I had cut out before. I glued it to the back of the bow, and wrapped it around.


Lastly, I glued the clip onto the back of the bow.


And I was finished! Here is how it turned out:


This DIY was very easy, and only took about 5 minutes. It was pretty fun, except for when I burned myself with the glue gun. Other than that, I really liked this DIY. I hope you try it out!
Until next week,
-Vasti

Saturday, May 23, 2015

DIY Marble Mugs

Hi! Today I will show you how to make these cool marble-looking mugs. Let's begin:

You will need:

  • White Ceramic Mug
  • Nail Polish
  • Warm Water
  • Old/ Disposable Container big enough for your mug
  • Cotton pads
  • Nail Polish remover
  • Toothpick
  • Paper Towels
  • Optional: Dishwasher Safe Mod-Podge


First, I put the warm water into my old container.


Then, I added a few drops of nail polish. I wanted my design different than it was when I poured the nail polish into the container, so I used a toothpick to make the design better.


After that, before the water cooled down, I dipped the mug into the water. Very carefully, I lifted the mug out of the polish. If you don't like how the design looks when you take it out, you can dip a cotton pad into some nail polish remover, and it comes right off. Then you can start over. It took me a couple of tries, but I finally got the look I wanted. After I had the look I wanted, I dabbed the design dry with a paper towel. Then I let it dry for about 2 hours. After that, I put a layer of Dishwasher-Safe Mod Podge on the design, and I was done! This is how it turned out:


This DIY was very cool to do. The design was pretty easy to achieve, and it didn't take that long, except for the dry time. I hope you try this simple DIY out!
Until next time, 
-Vasti

Saturday, May 16, 2015

DIY Tea Bags

Hello Again! Today I will show you how to make your own tea bags. Let's get started:

You will need:

  • Loose leaf tea
  • Coffee filters
  • Embroidery thread or yarn
  • Scissors 
  • Spoon
  • Thick needle


The first thing I did was cut the coffee filters. I cut them into different sizes, until I liked the size. 


The next thing I did was put my needle through my thread and tied a knot at the end of the thread. I then started sewing along the edges. I used a blanket stitch, but you can use any stitch you want to, as long as the tea doesn't come out. I only sewed three edges, because obviously, I needed to put in the tea. 


After that, I sewed the 4th edge, and tied a knot at the end. I repeated this process until I had how many I wanted. This is the final result:


This DIY was very simple, straightforward, fun, and only took about 10 minutes. I hope you try this out! Until next week,
-Vasti

Sunday, May 10, 2015

DIY Bath Bombs

Hi! Happy Mother's Day! Today I decided to show you how to make bath bombs. Let's begin:

You will need:

  • 1/4 cup of Epsom or Sea Salt
  • 1 cup of baking soda
  • Food Coloring
  • Lemon Juice
  • A container to mix with (I used a bowl)
  • Measuring Cup
  • Different bowls for different colors (I wanted to use 5 different colors, so I got 6 bowls)
  • Spray Bottle
  • Water
  • Molds to put bath bombs in
  • Spoon


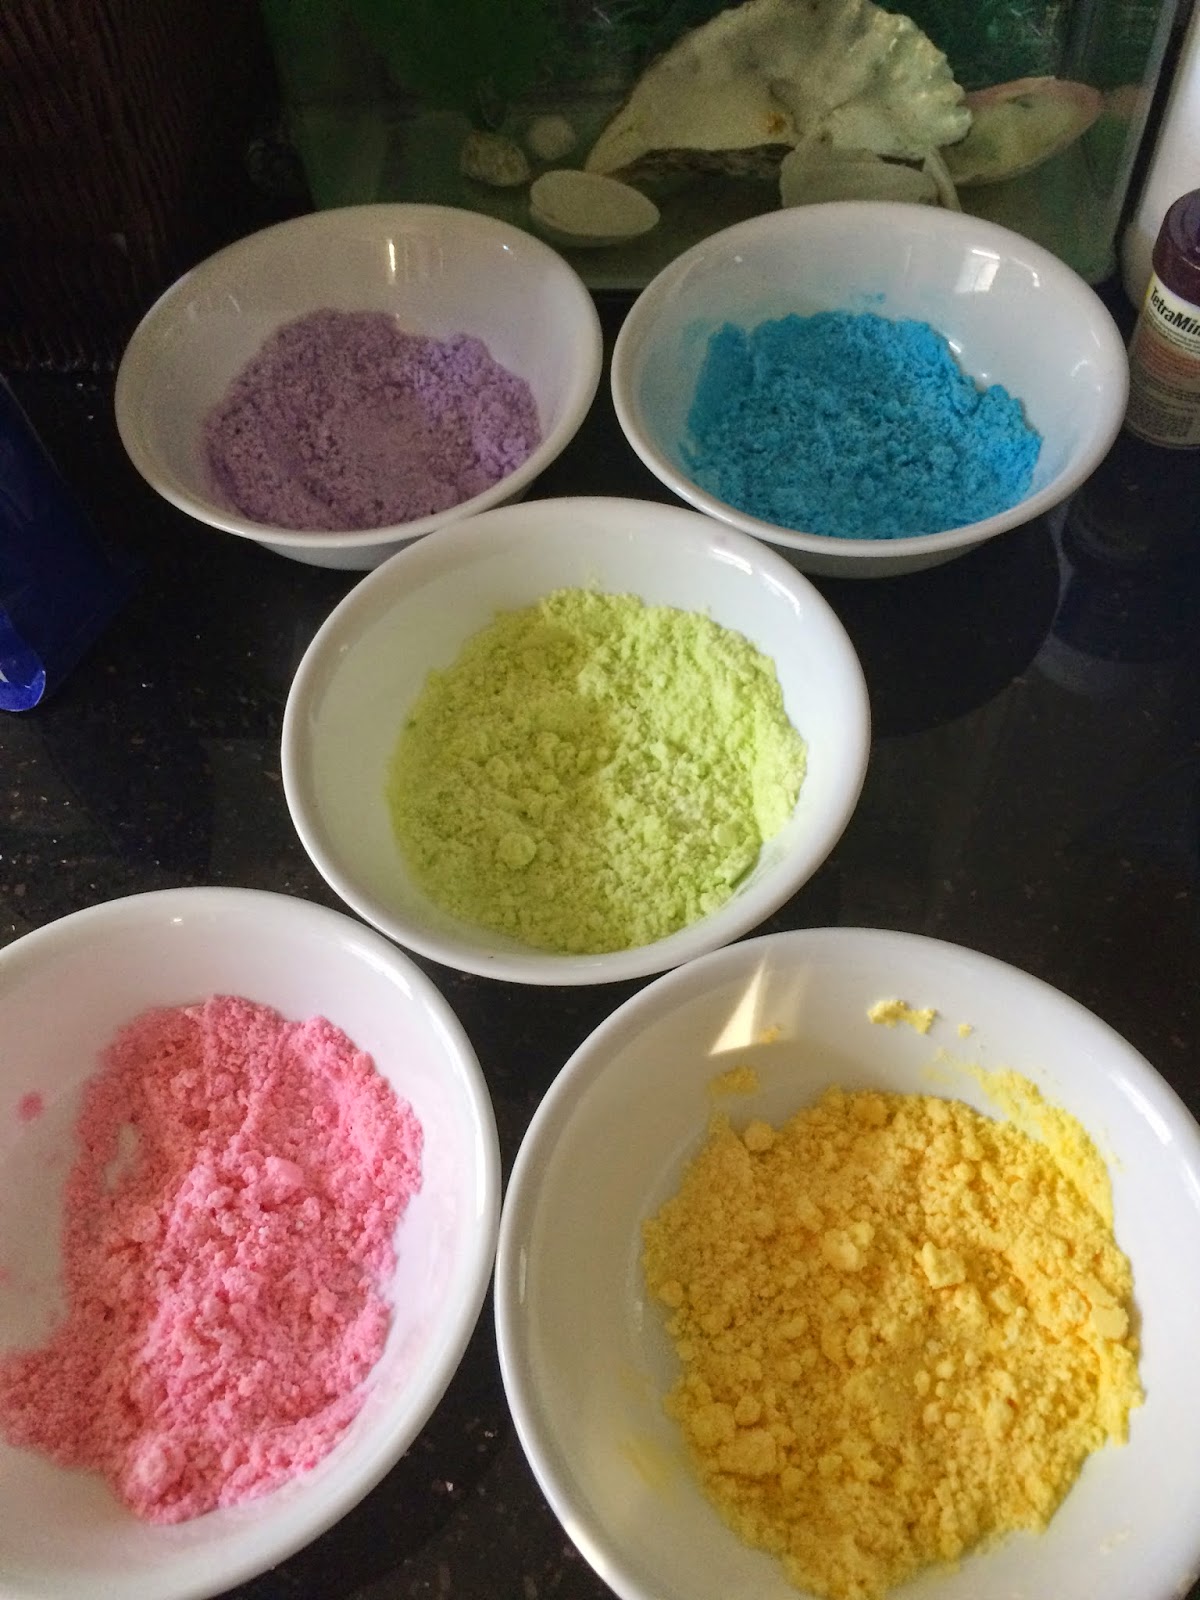
Okay, so the first thing I did was get my 6 bowls out. I made 5 different colors, but the 6th bowl was for mixing. I used the largest bowl and put in the epsom/sea salt and mixed it together. 


Then, I separated the mix into 5 smaller bowls. After that, I put 3 drops of food coloring into each bowl.


After that, I got out my spray bottle. I put a small amount of water in first, then I filled it halfway full to the top. Then I shook it to make sure it was well combined. Then I sprayed the mix into the bowls. I sprayed then mixed, sprayed then mixed, until everything was combined, and I had the color I wanted.


Then, I packed the powder into my molds. It's really important to pack them down really tightly, or else they won't hold their shape. I didn't pack most of them tightly enough, so you will see that only a few ended up looking good.


After that, I put them in the freezer for 2 hours. For me, this is the hardest part, because I am really impatient. After they were complete. I took them out of their molds, and this is how they turned out:


As you can see, most of them didn't hold their shape. This is why you have to pack the powder TIGHTLY. Well, being a DIYer is all about try and failure, so when in doubt, improvise! I turned the bad ones into bath salts, and put them in containers. I put the good ones on top of the bath salts so they would be somewhat decent. Here is the final result:


I know they look really ugly in the photo, but trust me, they look really good in real life! This DIY was pretty fun, somewhat easy, and kind of time consuming. It was also really messy, but in the end it was worth it! I gave this to my mom for Mother's Day and she loved them! I hope you try this out. Remember, it's the thought that counts!
Until next week, 
-Vasti
P.S. Email me DIYs that you would like to see on this blog at: koalalife11@gmail.com and I will make sure to get to it!

Sunday, May 3, 2015

DIY Chia Pudding

Hi! Today I will show you how to make your own chia pudding. It is like tapioca pudding, but healthier. It is so cool how the chia seeds gel up when in contact with any liquid! Let's get started:

You will need:

  • 2 tablespoons chia seeds
  • 1/4 cup almond milk (I used dark chocolate almond milk)
  • Spoon to mix
  • Container to mix in
  • Container to put finished pudding in
  • Strawberry for garnish
The first thing to do is get the ingredients.


The next thing to do is to mix the two ingredients in the container. Feel free to add more chia seeds or put in less almond milk. Before the chia seeds react to the almond milk, put the chia mix into the other container, put it in the refrigerator wait for it to get gelatinous. It usually takes a 1/2 hour, give or take. When it is gelatinous, it is ready! Here is the end result:


I know that this isn't really a DIY, but it was still fun. It was not that time consuming, and it was really easy. I hope you try this sometime! 
Until next time,
-Vasti